In this exercise, you’ll work with a separate composition—the one you imported from a layered Photoshop file.
- Select the Project tab to display the Project panel, and then double-click the title composition to open it as a separate composition in its own Timeline panel.
Note
If the Project tab isn’t visible, choose Window > Project to open the Project panel.
This composition is the layered Photoshop file you imported. Two layers—Title Here and Ellipse 1—appear in the Timeline panel. The Title Here layer contains placeholder text that was created in Photoshop.

At the top of the Composition panel is the Composition Navigator bar, which displays the relationship between the main composition (movement) and the current composition (title), which is nested within the main composition.
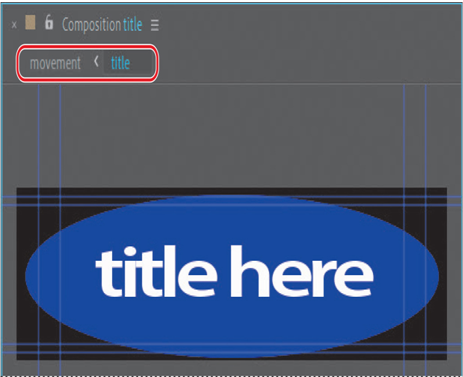
You can nest multiple compositions within each other; the Composition Navigator bar displays the entire composition path. Arrows between the composition names indicate the direction in which information flows.
Before you can replace the text, you need to make the layer editable.
About the Tools panel
As soon as you create a composition, the tools in the Tools panel in the upper left corner of the After Effects application window become available. After Effects includes tools that enable you to modify elements of your composition. Some of these tools—the Selection tool and the Hand tool, for example—will be familiar to you if you use other Adobe applications, such as Photoshop. Others will be new.

A. Home B. Selection C. Hand D. Zoom E. Orbit Camera F. Pan Camera G. Dolly Camera H. Rotation I. Pan Behind J. Mask and Shape tools K. Pen tools L. Type tools M. Brush N. Clone Stamp O. Eraser P. Roto Brush and Refine Edge tools Q. Puppet tools
When you hover the pointer over any button in the Tools panel, a tool tip identifies the tool and its keyboard shortcut. A small triangle in the lower right corner of the button indicates that one or more additional tools are hidden behind it. Click and hold the button to display the hidden tools, and then select the tool you want to use.
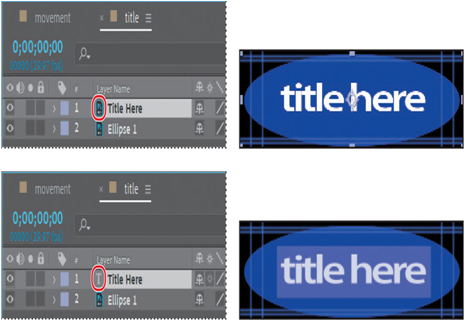
2. Select the Title Here layer (layer 1) in the Timeline panel, and then choose Layer > Create > Convert To Editable Text.
Note
If you see a warning about missing fonts or layer dependencies, click OK. If Adobe Fonts opens, activate the missing font.
A T icon appears next to the layer name in the Timeline panel, indicating that it is now an editable text layer. The layer is also selected in the Composition panel, ready for you to edit.
The blue lines at the top, bottom, and sides of the Composition panel indicate title-safe and action-safe zones. Television sets enlarge a video image and allow some portion of its outer edges to be cut off by the edge of the screen. This is known as overscan. The amount of overscan is not consistent between television sets, so you should keep important parts of a video image, such as action or titles, within margins called safe zones. Keep your text inside the inner blue guides to ensure that it is in the title-safe zone, and keep important scene elements inside the outer blue guides to ensure that they are in the action-safe zone.