The next step of the workflow is to create a composition. You create all animation, layering, and effects in a composition. An After Effects composition has both spatial dimensions and a temporal dimension (time).
Compositions include one or more layers, arranged in the Composition panel and in the Timeline panel. Any item that you add to a composition—such as a still image, moving-image file, audio file, light layer, camera layer, or even another composition—becomes a new layer. Simple projects may include only one composition, while elaborate projects may include several compositions to organize large amounts of footage or intricate effects sequences.
To create a composition, you’ll drag the footage items into the Timeline panel, and After Effects will create layers for them.
Tip
To create a composition from footage as you import it, select Create Composition in the Import File dialog box.
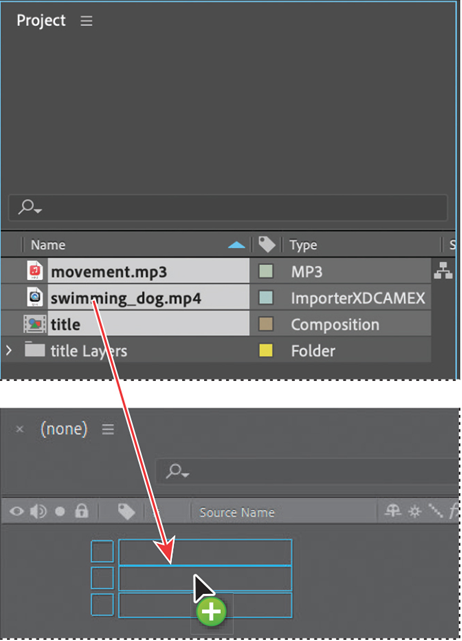
- In the Project panel, Shift-click to select the movement.mp3, swimming_dog.mp4, and title assets. Don’t select the title Layers folder.
- Drag the selected footage items into the Timeline panel. The New Composition From Selection dialog box appears.
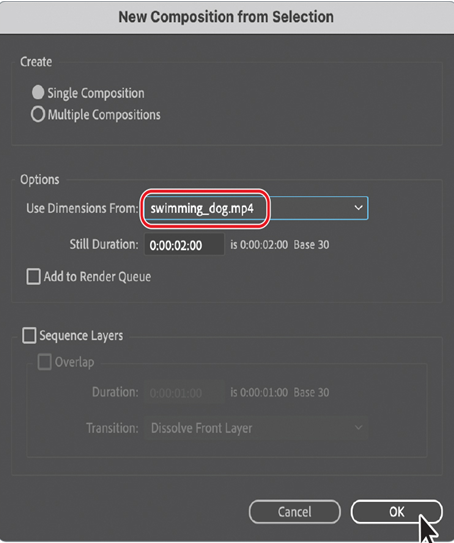
After Effects bases the dimensions of the new composition on the selected footage. In this example, all of the footage is sized identically, so you’ll accept the default settings for the composition.
- Select swimming_dog.mp4 in the Use Dimensions From menu, and then click OK to create the new composition.
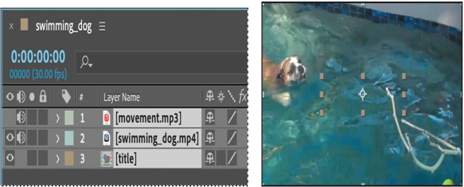
The footage items appear as layers in the Timeline panel, and After Effects displays the composition, named swimming_dog, in the Composition panel.
When you add a footage item to a composition, that footage becomes the source for a new layer. A composition can have any number of layers, and you can also include a composition as a layer in another composition, which is called nesting.
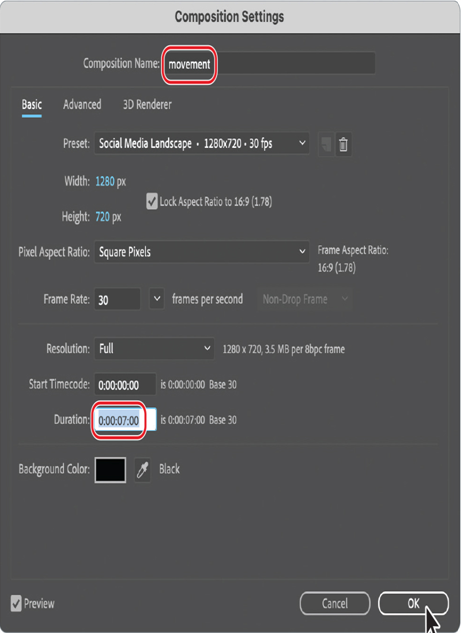
Some of the assets are longer than others, but you want them all to continue only as long as the swimming dog is on the screen. You’ll change the length of the entire composition to 7:00 to match the dog clip.
- Choose Composition > Composition Settings.
- In the Composition Settings dialog box, rename the composition movement, type 7:00 for the Duration, and then click OK.
The Timeline panel displays the same duration for each of the layers.
In this composition, there are three footage items, and therefore three layers in the Timeline panel. Depending on the order in which the elements were selected when you imported them, your layer stack may differ from the one shown on the previous page. The layers need to be in a specific order as you add effects and animations, however, so you’ll rearrange them now.