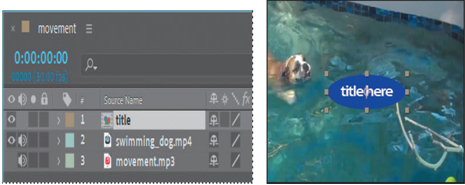
The title is currently in the center of the screen, obscuring the dog and distracting from the action. You’ll move it to the lower left corner, where it will remain visible but not in the way.
- Select the title layer (layer 1) in the Timeline panel. Notice that layer handles appear around the layer in the Composition panel.
2. Click the arrow to the left of the layer number to expand the layer, and then expand the layer’s Transform properties: Anchor Point, Position, Scale, Rotation, and Opacity. Notice that the same properties appear in the Properties panel.
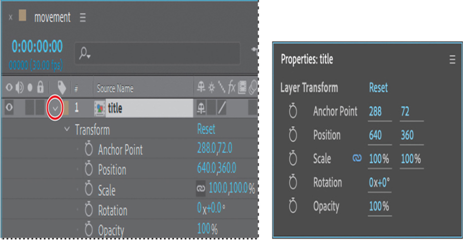
3. If you can’t see the properties, scroll down the Timeline panel using the scroll bar at the right side of the panel. Better yet, select the title layer name again, and press P.
This keyboard shortcut displays only the Position property, which is the only property you want to change for this exercise. You’ll change the Position property to move the title layer to the lower left corner.
4. Change the coordinates for the Position property to 265, 635. Or use the Selection tool to drag the title to the lower left corner of the screen.
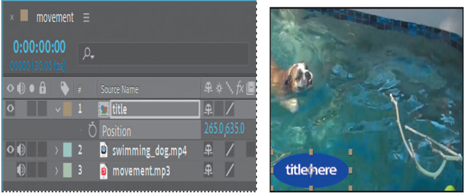
5. Press P to hide the Position property, or click the arrow to the left of the layer number to hide all properties.
Adding an effect to correct color
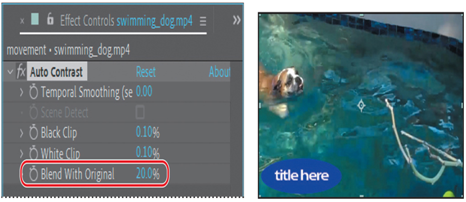
After Effects includes several effects to correct or modify color in your projects. You’ll use the Auto Contrast effect to adjust the overall contrast in the clip and intensify the color of the water.
- Select the swimming_dog.mp4 layer in the Timeline panel. Note
If you double-click a layer in the Timeline panel, After Effects opens the layer in the Layer panel. To return to the Composition panel, click the Composition tab. - In the Effects & Presets panel (in the panel stack at the right side of the application window), type contrast in the search box.
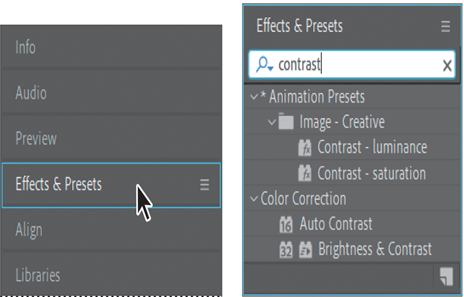
After Effects searches for effects and presets that contain the letters you type, and displays the results interactively. Before you have finished typing, the Auto Contrast effect—located in the Color Correction category—appears in the panel.
- Drag the Auto Contrast effect onto the swimming_dog layer in the Timeline panel.
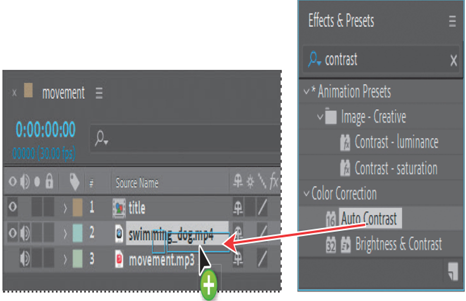
After Effects applies the effect and opens the Effect Controls panel in the upper left area of the workspace.
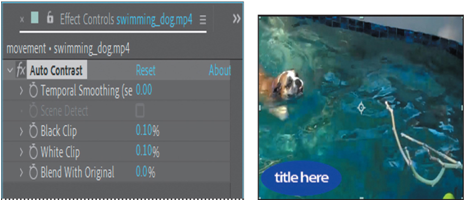
The contrast intensifies colors a little more than you need. You’ll customize the settings to reduce the effect.
- In the Effect Controls panel, click the number next to Blend With Original, type 20%, and press Enter or Return to accept the new value.